
Introduction
The middle of a floor is the easy part. Kerbs, thresholds, expansion joints, drainage outlets, the seams where one material meets another — this is where deterioration usually begins. Terralux™ PolyMatrix Pro is detailed for those conditions specifically, and this piece covers what a specifier should be asking about each one.
Where Deterioration Usually Starts
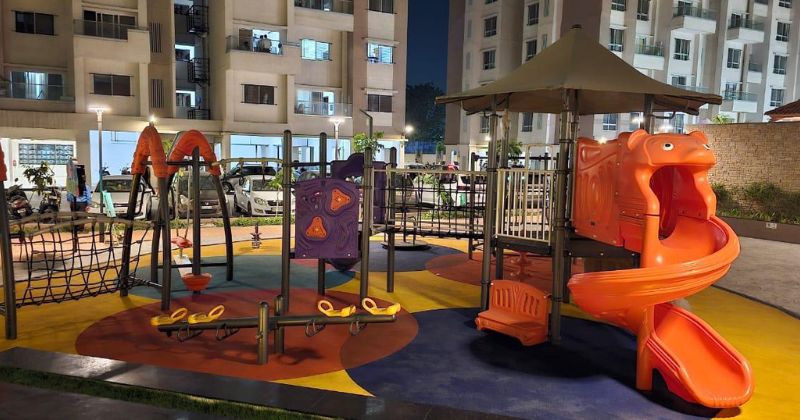
Walk any paved area that has aged poorly and look closely at where the damage sits. It is almost never in the open field. It is at the kerb line, around the drainage grating, along the joint where the paving meets the building, at the threshold into the lobby, at the point where the surface has to stop being itself and become something else.
There is a straightforward reason for this. The middle of a surface experiences uniform conditions. It expands and contracts as one continuous plane, sheds or absorbs water evenly, and carries loads distributed across a large area. An edge experiences none of that. It is a discontinuity, and every stress the surface undergoes — thermal, hydraulic, mechanical — concentrates precisely at that point.
Most specification documents devote considerable attention to the field material and comparatively little to terminations. The material schedule names the surface, the thickness, the finish, and the colour. The edge condition often appears as a single line on a drawing or is left to the contractor to resolve on site. This is where durable surfaces are made — or unmade.
How Terralux™ PolyMatrix Pro Handles the Transition
Terralux™ PolyMatrix Pro is a resin-bound system: the aggregate is fully encapsulated in the resin binder and trowelled into a single, monolithic plane. This matters at the edges more than anywhere else. There are no individual units to shift, no jointing sand to wash out, and no repeating grid of seams for water to exploit. Across the field of the surface, there is simply nothing to come apart.
That leaves the perimeter as the one condition that must be detailed correctly. Terralux™ PolyMatrix Pro requires a restraining edge — typically a kerb or upstand — with the adjacent element set a minimum of 18mm above the prepared Terralux PolyMatrix Pro top course, giving the surface a firm, stable termination. Where expansion joints exist in the base beneath, they must be carried up through the surface, not bridged. Where the surface meets a drainage outlet or a building line, the detail must accommodate movement without opening a gap.
A surface is only as durable as the way it ends.
Restraining Edge — Drawing Concept
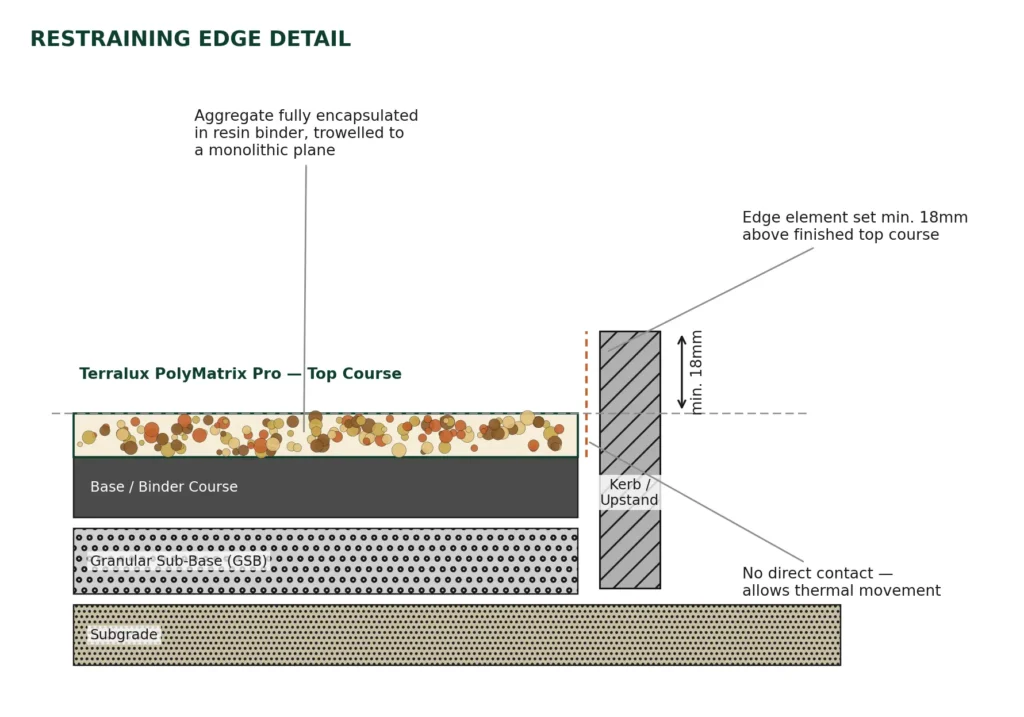
Cross-section showing the kerb/upstand set a minimum of 18mm above the finished Terralux surface.
Key Points
- Edge element set a minimum of 18mm above the top course.
- No direct contact between the surface and the edge element — allows for thermal movement.
- Base and sub-base prepared to ensure proper load transfer.
Four Edge Conditions Worth Specifying Explicitly
1. The Restraining Edge
Every bound surface needs a structural boundary to push against — a kerb, an upstand, a channel, or a building plinth. What matters is that the edge is fixed, continuous, and set at the correct level relative to the finished surface. Terralux is laid with the edge element set a minimum of 18mm above the top course, so the relationship between the edge element and the surface depth must be coordinated at drawing stage, not discovered on site.
2. The Expansion Joint
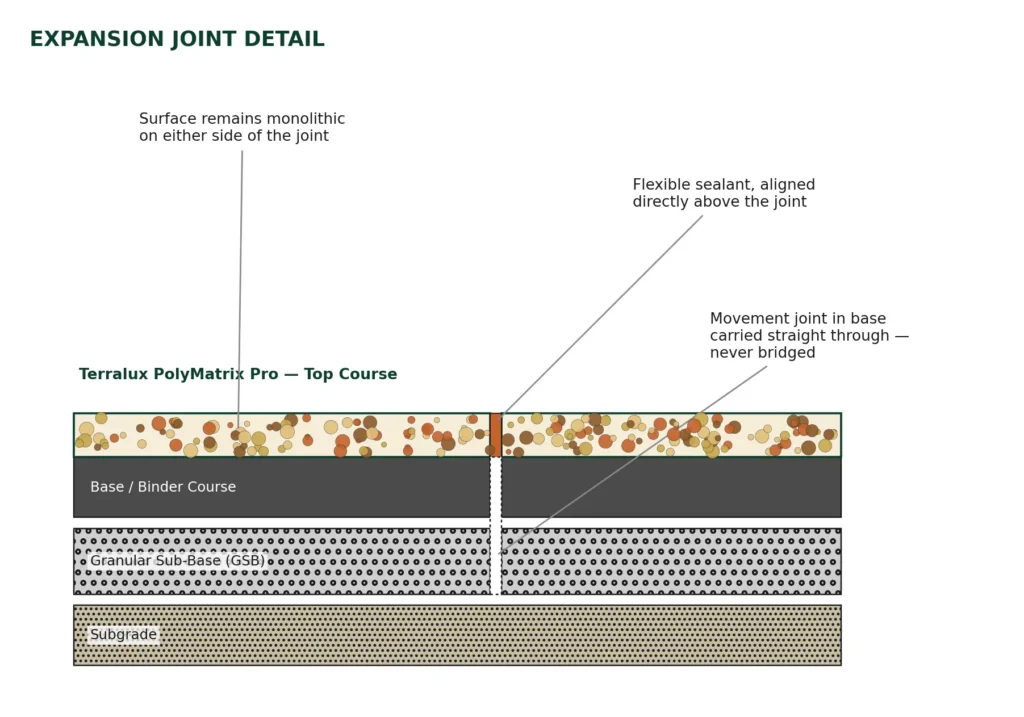
If the base has a movement joint, the surface above must have one in the same location. Bridging a joint with a continuous surface transfers movement into the material, and the material will eventually relieve that stress by cracking — usually in a line directly above the joint it was asked to ignore. Carrying the joint through is a detailing decision, not a site compromise.
Cross-section showing a movement joint in the base carried up through the Terralux surface with a flexible sealant.
3. The Drainage Interface
Because Terralux™ PolyMatrix Pro is permeable, water passes through the surface into the drainage layer beneath. Where that layer discharges — at a channel, gully, or soakaway — the connection must be designed so water leaves cleanly rather than accumulating at the boundary. A permeable surface sitting on a base with nowhere to drain is a tank, not a drainage system.
Detail showing the permeable Terralux surface draining into a channel or gully, graded towards the outlet.
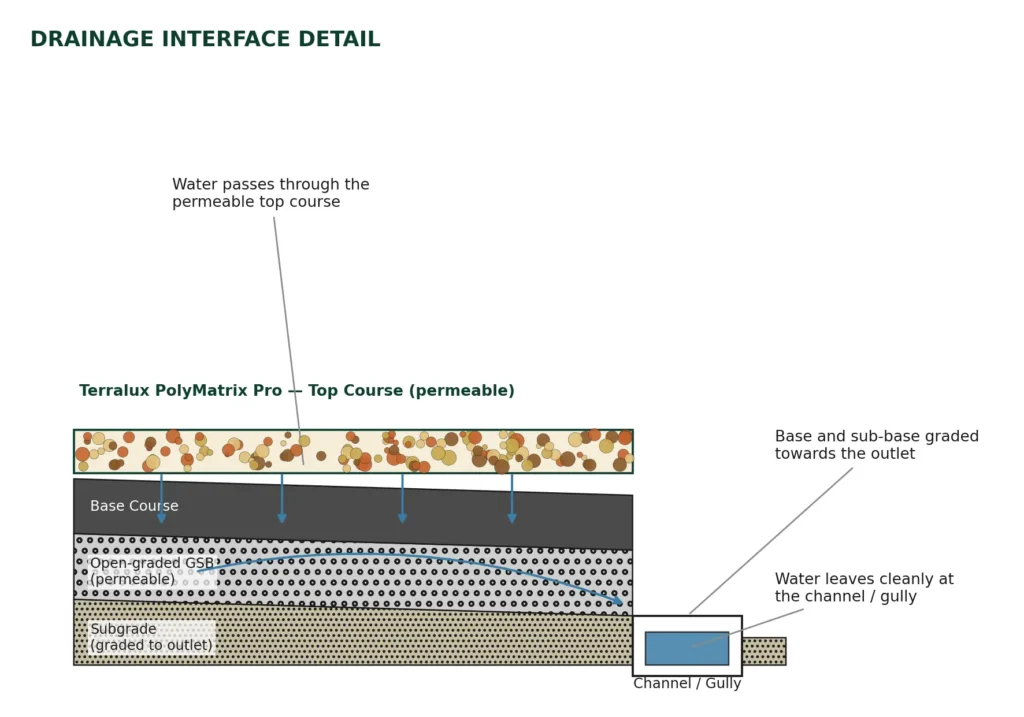
Detail showing the permeable Terralux surface draining into a channel or gully, graded towards the outlet.
4. The Material Threshold
Where the surface meets another material — a lobby floor, a lift landing, or pool coping — two things happen simultaneously: a change in material behaviour and often a change in level. Indian practice under NBC 2016 and the RPwD Harmonised Guidelines requires thresholds at accessible routes to be kept flush or within a small tolerance. This detail carries a compliance dimension alongside the durability one.
What Happens on an Existing Base
Resurfacing over an existing base introduces its own edge conditions. Terralux can be laid over sound existing bituminous macadam or concrete, but the guidance is explicit about what must happen first:
- Cracks must be treated with a cross-layer membrane, not simply covered.
- Badly damaged areas must be removed and reinstated to a minimum depth of 200mm, not patched.
- Existing expansion joints must be identified and carried through.
- Edge and kerb details must be reworked to the correct protrusion.
- The base must be completely dry before laying begins.
None of this is unusual for a bound surfacing system. It is highlighted here because it tends to be the part of a refurbishment programme that gets compressed when a schedule slips — and it is also the part that determines whether the new surface behaves like a new surface in three years.
What to Put in the Specification
The practical takeaway is that edge conditions deserve the same level of detail as the field material. A specification that names the surface, depth, aggregate blend, and finish has described perhaps eighty percent of the area — and a much smaller share of the risk.
Worth stating explicitly:
- The restraining edge type and its level relative to the finished surface.
- The location of every movement joint carried up from the base.
- The drainage discharge detail at each outlet.
- The threshold condition wherever the surface meets another material or an accessible route.
Terralux™ PolyMatrix Pro is supplied with base, sub-base, and edge guidance covering each of these points.
The Koochie Global technical team can also review a proposed detail before it goes into a package.